
What’s new
Major Update
A major update has been provided in the accounts detail section, plus a brand new product lists screen, and a major overhaul of the price brochures.
- Creating Price Brochures & Brochure Defaults (note this is where you can update your account information that appears on the customised or price brochures you can generate).
- Product Lists
- Product Markups
- Brand Markups
Creating Price Brochures & Updating Brochure Defaults
Major overhaul to brochures and generating of your own custom price brochures. Previously, this feature would generate a price brochure showing all product lines in a family. This has had a major upgrade and gives you so much flexibility such as;
- Allow you to generate a price brochure by selecting 1 or more products in a family
- Create a brochure using the products you selected (with no pricing)
-
Detailed price list using the products you selected with option to show RRPs or your cost (remember you can internally change your RRPs for customers and you can change your sell prices for your staff to see – refer to Product Markups or Brand Markups section)
- Create a price list (as per point 3, but a simpler version without the full product description)
Generating a detailed price list and selecting multiple products for an end user
Generating a price list for internal use – note the branding here is Lock n Key.
Remember to update your account details in “Brochure Defaults” – this can be accessed by clicking in the left menu “My Account”, then “Account Details”. Here you can also edit the colours of the brochures you are creating – see example video below. This is perfect to get the colours of the price brochure to match to your logo and brand colours by selecting the colour OR typing in the RGB OR simply using the eyedropper
![]()
icon to select your colour.
How to edit the colours and what it looks like in a price brochure afterwards
Product Lists
Product lists allow you to quickly create your own list of products that for example you would typically use quite often such as a general list of products you would quote daily (e.g. domestic upgrades). It also gives you the control to produce bespoke price brochures for your customers using the standard RRP or a revised RRP that you can set for additional margin. You also have the ability to export product lists in a CSV format which allows you to use to import in to your own systems. In addition, product images will also be available in each row of your exported CSV file.
To create product lists, you have to first add products to your newly created product list. To do that, let’s create a new product list.
Creating a Product List
4. There are many ways to add products to your list (even from previous orders purchased) and then customise (optional) your prices. Simply look for the “product lists” icon![]() and once you press it, the icon lights up green as shown
and once you press it, the icon lights up green as shown![]() Let’s add a few different products.
Let’s add a few different products.
5. Now once we click on “SUPER LOCKSMITH TEST”, it will show our product list. In this example we have the Carbine C45-BR padlock, a CEL3in1 leverset, and an Acrobat flip bolt mortice lock. Here you can change your prices for this list only by clicking on a single product and clicking the “Change RRP” button OR if you want to make this price more permanent, then you can simply “Send to product mark ups” and change it. there.
6. Here you can also change quantities and add the products to your cart.
Product Lists Overview
Exporting Product Lists to CSV Including Product Images
Product Mark ups
Before going in detail on Product Mark ups – please note that this is completely optional and once you activate it, it can be deactivated at any time.
Product mark ups gives you control to set individual prices of products permanently. This is a great feature to allow for product price changes to suit your business. NOTE if Davcor has a price increase on a product, by having product mark ups turned on, then those products you have in your product mark ups will automatically rise to protect your margin.
To add products into your Product markups, simply create a product list and then “Send to Product Mark Ups” as demonstrated below.
Adding product to product mark up and changing
Deleting a product from product mark up
Brand Mark ups
As per Product Markups this is a completely optional section. Brand markups allow you to simply set a gross margin or markup you wish to make for each brand – this includes all products in this brand. Note, if you leave a brand at “0.0” this simply means your pricing will follow the manufacturers RRP. Please note do not try and set a brand back to 0, please use the Restore Default RRPs method shown in the video below, by clicking the brand you want to restore and then click Restore Default RRPs.
Deleting a brand mark up
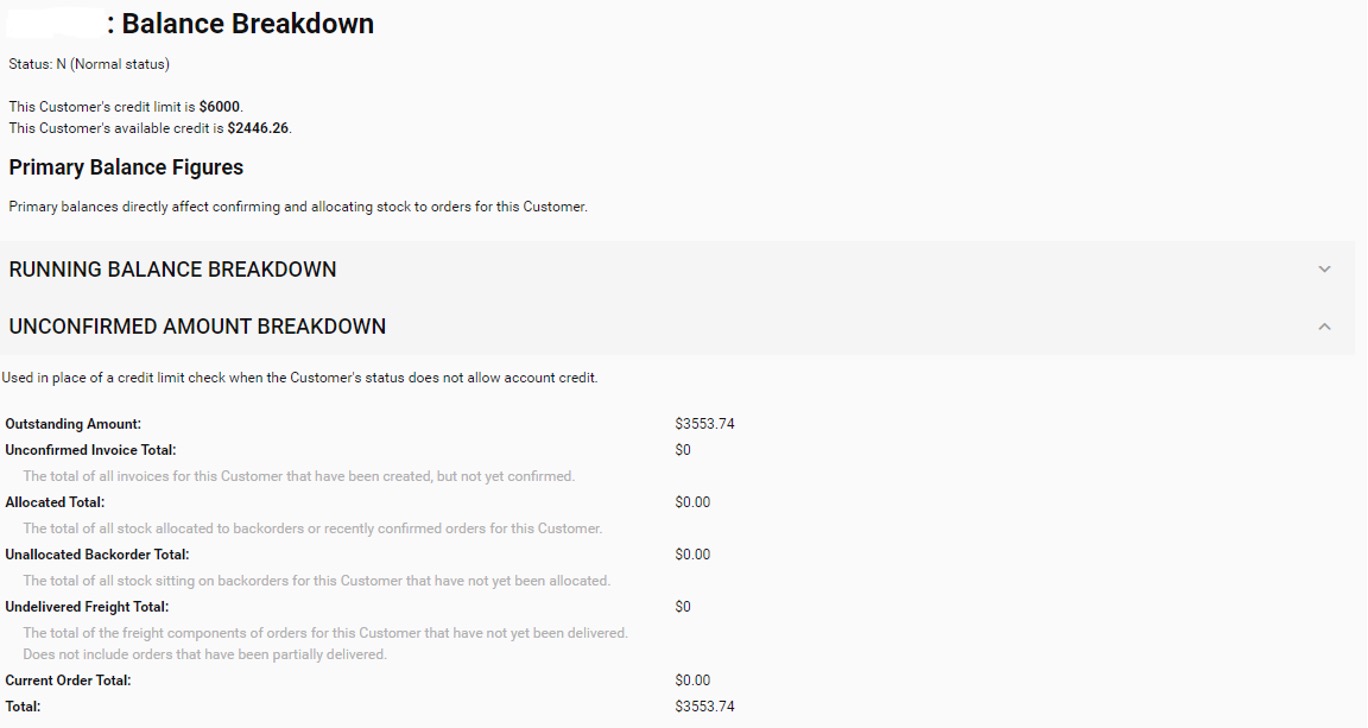
Balance Breakdown
Once you navigate to “My Account” then “Account Details” menu on the left side of the screen, you will then see the below screen. Once you click on “Balance Breakdown” this screen shows a break down of your current account financials. It shows a running balance breakdown as shown below.
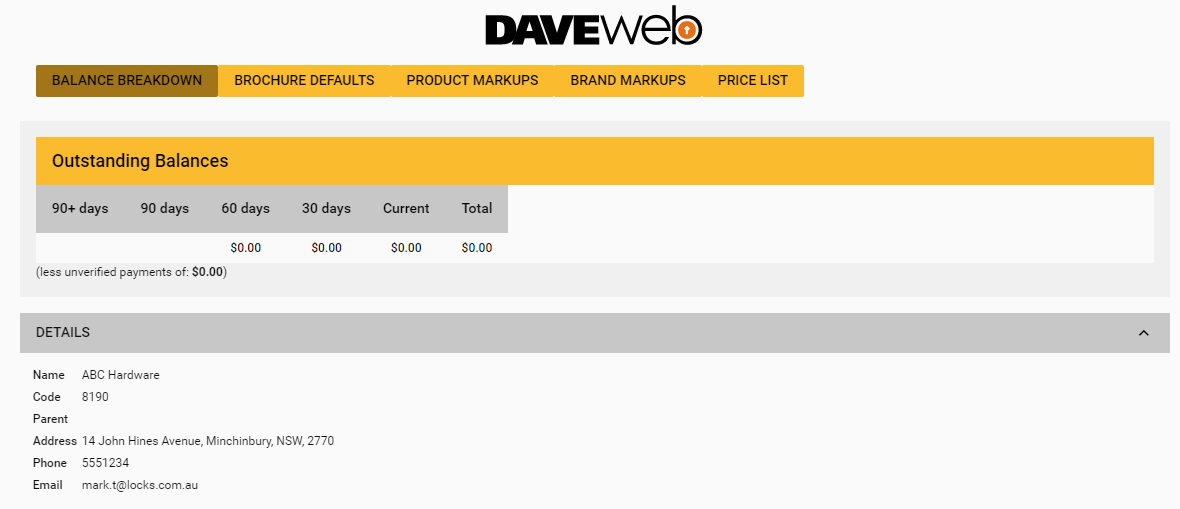
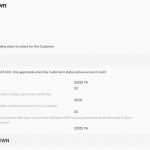
In addition, there is an unconfirmed amount breakdown showing further details such as allocated back orders.
Confirmation of Order Screen
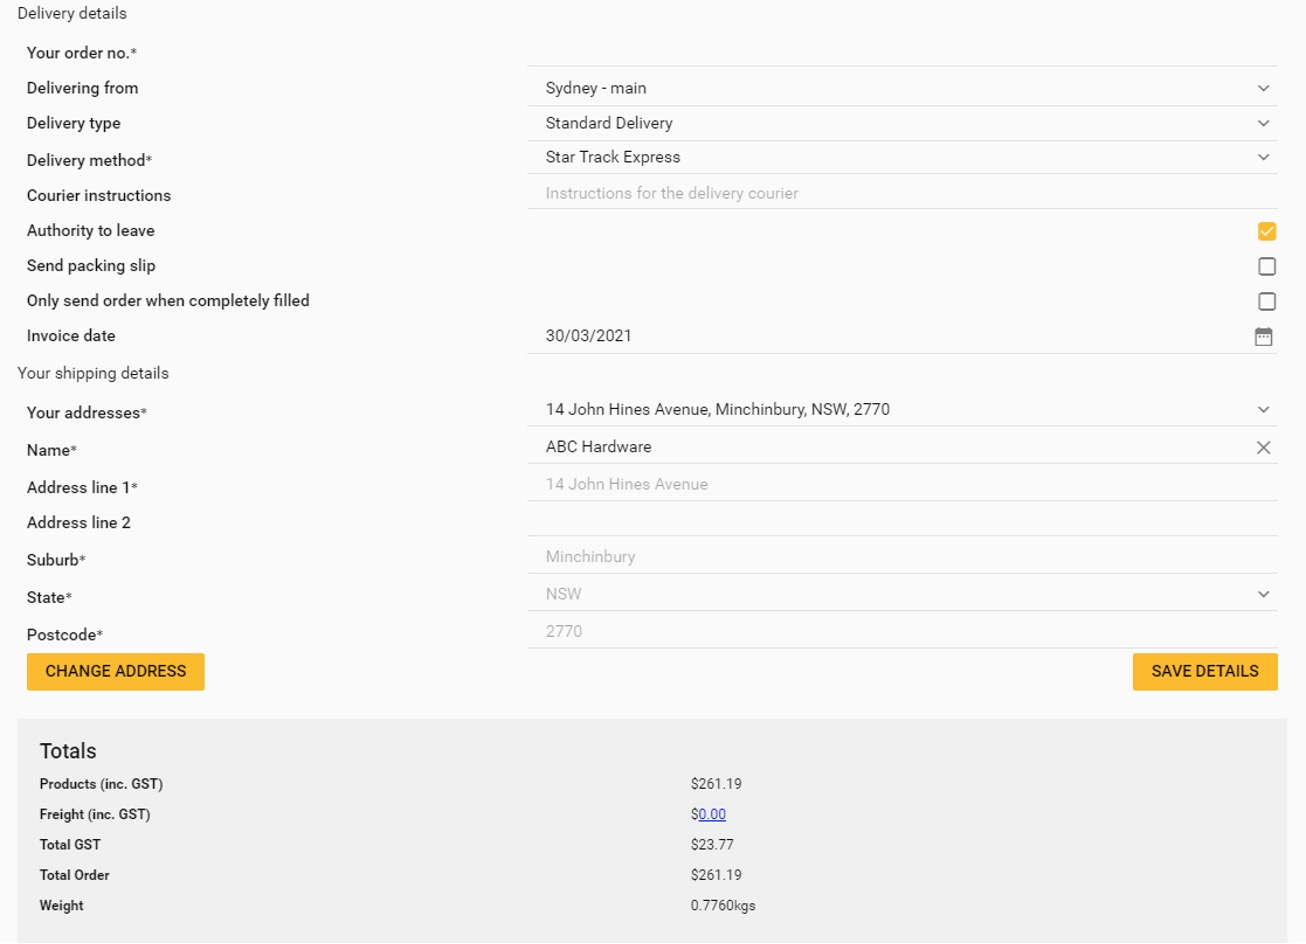
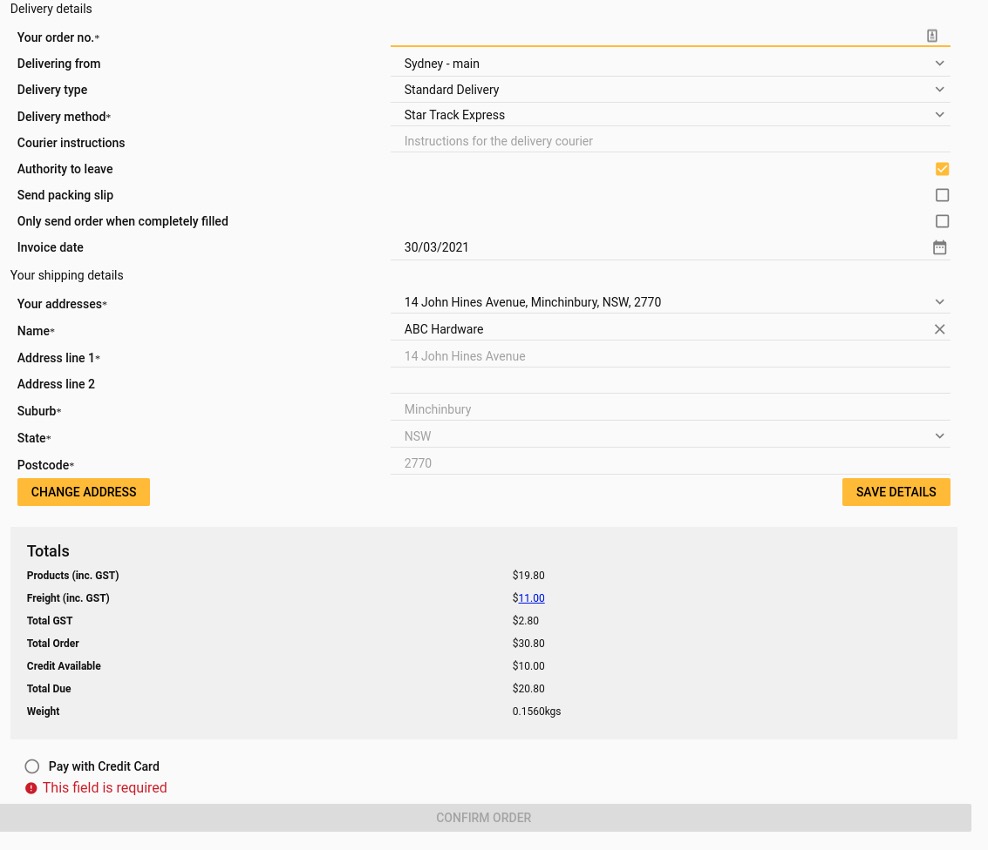
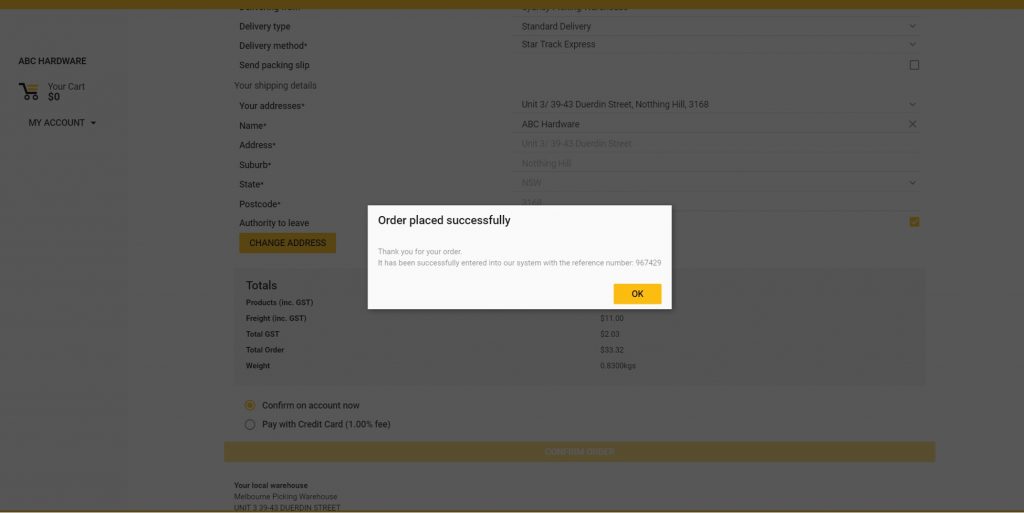
Once you’ve finished adding your products to your cart and ready to order, you will see the below order confirmation screen.
A reminder that authority to leave is to give the courier authority to leave your order at your chosen delivery address without you having to sign for it. ‘Send packing slip’ is if you want to send to your end customer and you don’t want them to see your prices and our company.
Also note there is a new option to only send the order when it is completely filled.
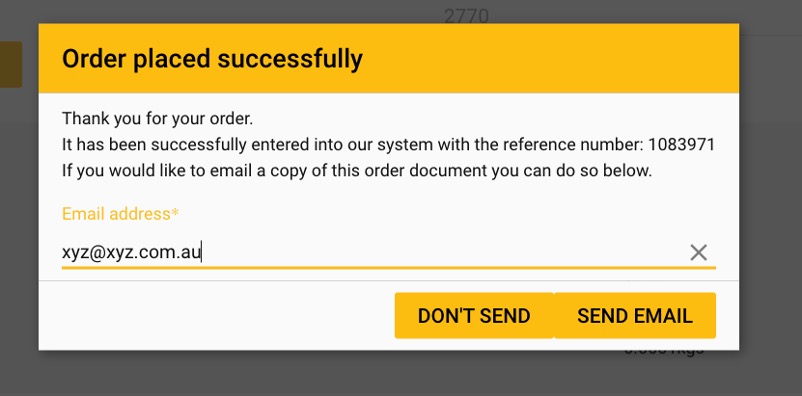
Once you confirm your order a pop up arises asking if you would like to email a copy of this order document to someone as shown below.
Also for credit card customers only – you can now apply an existing credit on an order as shown below.
Customer Previous Orders
Once you navigate to “My Account” then “Previous Orders” menu on the left side of the screen, you will then see the below screen. In the Previous Orders screen you can now email your order document. Simply click on a previous order and the below screen will appear.
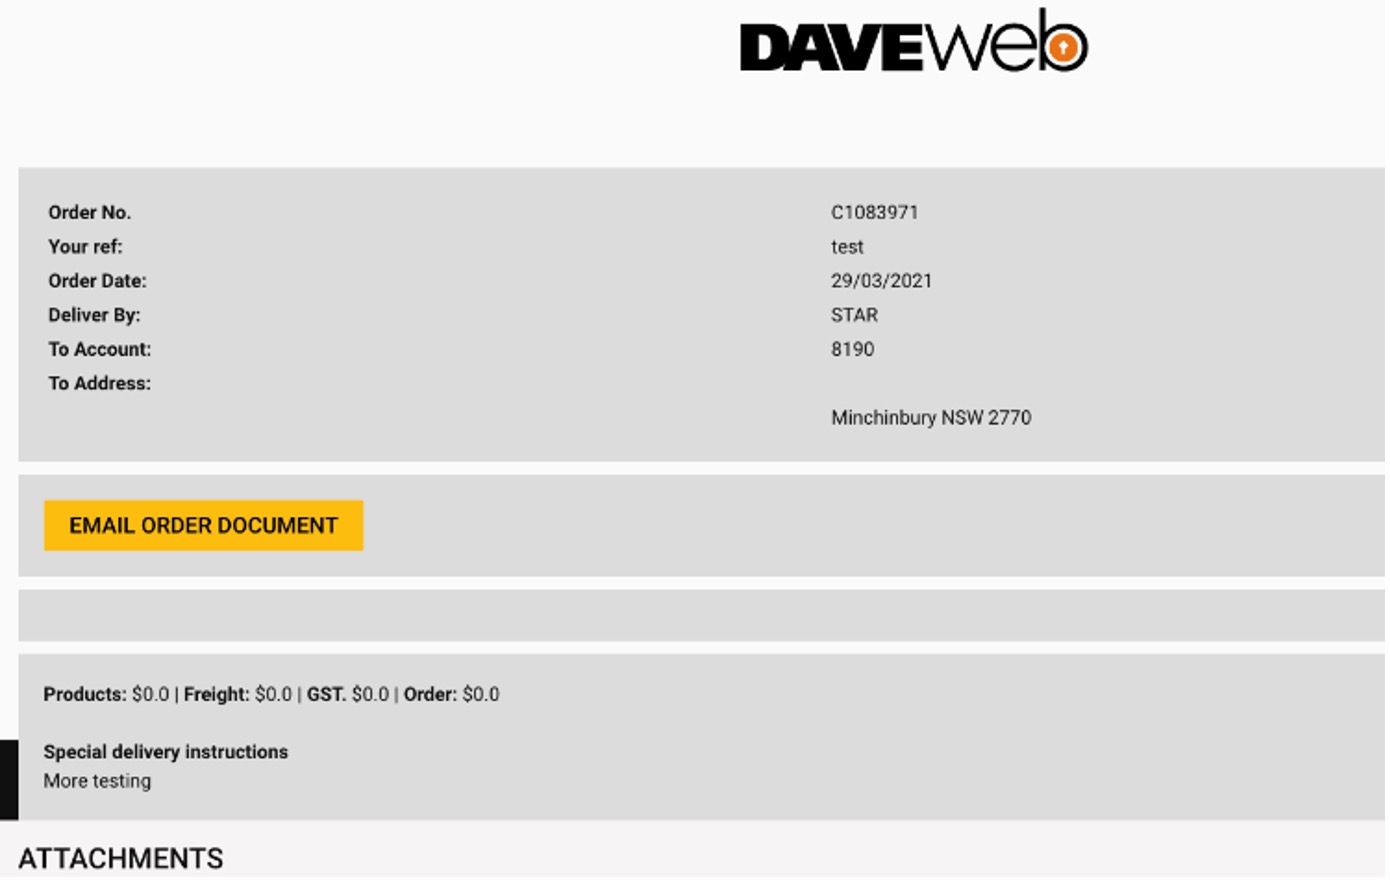
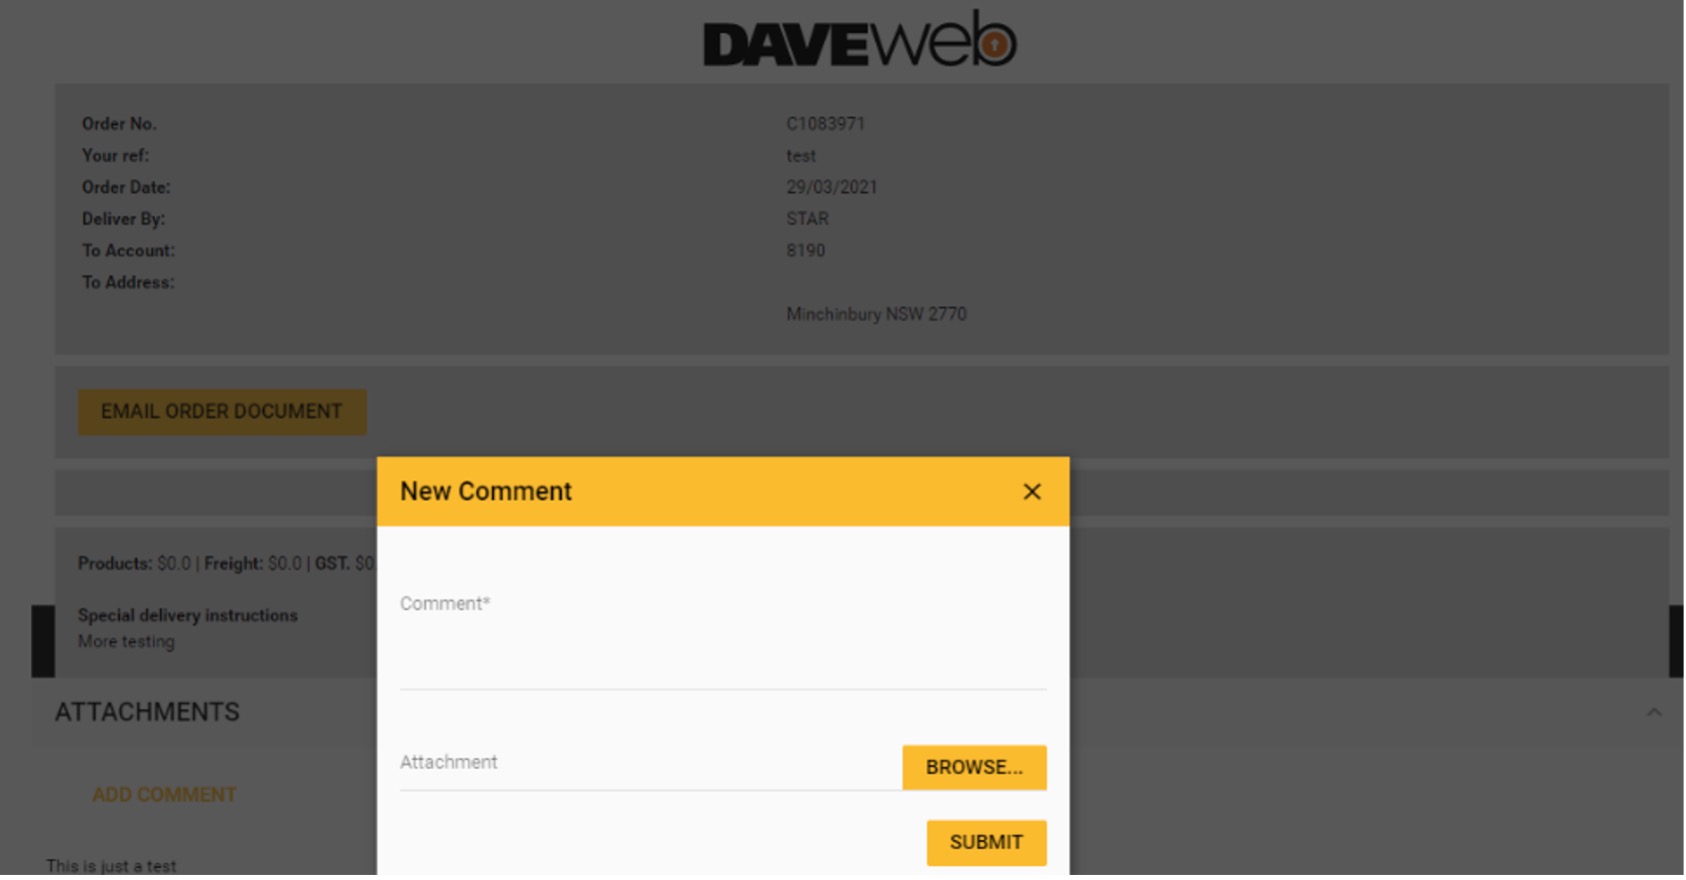
Also available for previous orders and/or at the time of order, the option to add comments (that are seen by yourself only) or attachments (again that are seen by yourself only). This is particularly good for your own internal references of orders.
Comment on items in your cart and invoice lines
This is a great feature to add comments per line item ordered. For example, you could add a note for your internal staff such as your admin or accounts, or even a note to advise that a line item applies to a job number.
Fully compatible with iPhones, iPads, and Safari browser
Good news – we have fixed the interface to allow you to place orders and browse the catalogue using Apple devices. See below example from an iPhone.
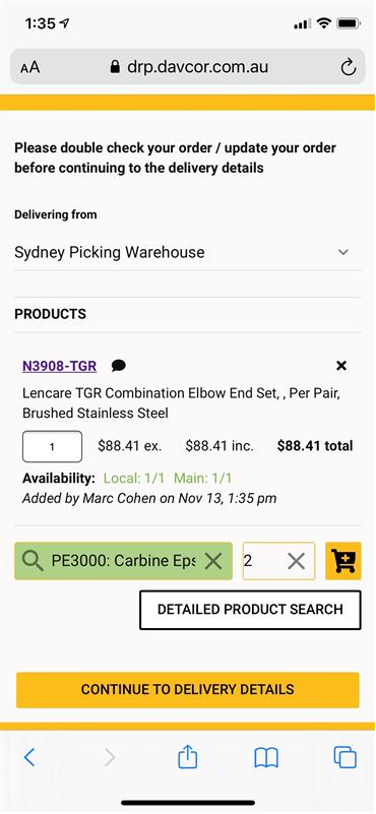
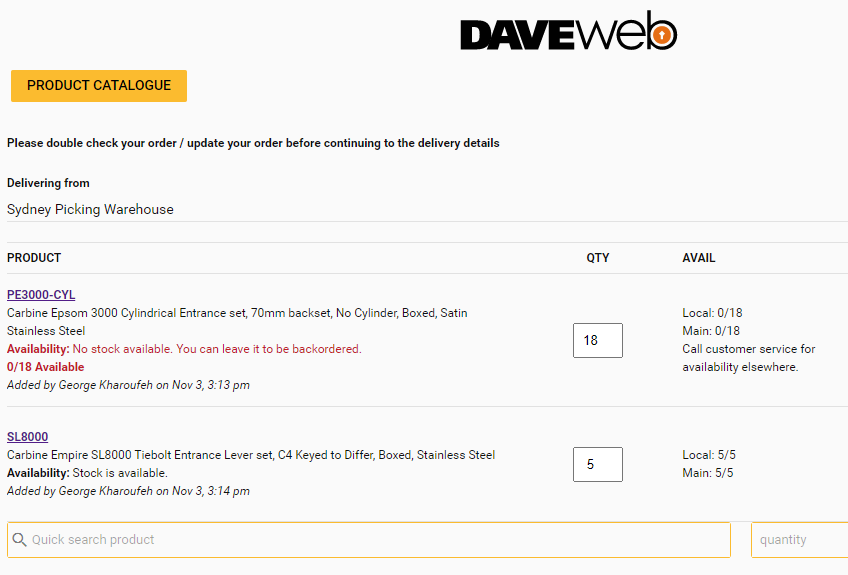
Stock Availability Shown in Your Local Warehouse & Syd Warehouse
In the Cart screen, stock is shown in your local warehouse and in Main (Sydney) warehouse. If there is no stock available in those two locations, there is a prompt to “Call customer service for availability elsewhere”.
Also clicking on the Daveweb logo takes you back to the product catalogue page.
Orders Displayed Available on Catalogue Screen with Link
As soon as you place an order in Daveweb, it will show above the catalogue screen. It will take a minute for the link to your order to show. See example below.
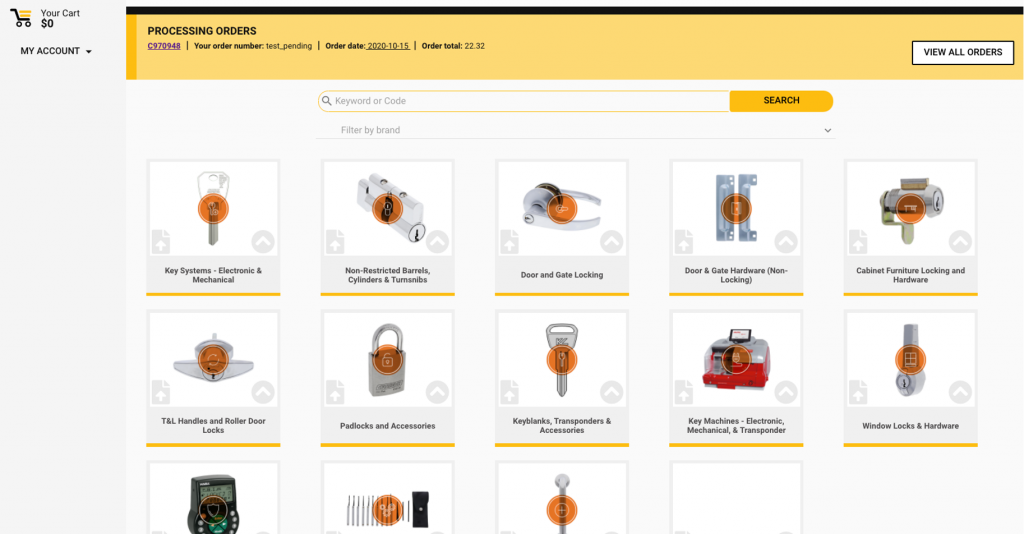
Davcor Reference Numbers Per Order
Newly placed orders have a success message with our (Davcor) reference number.
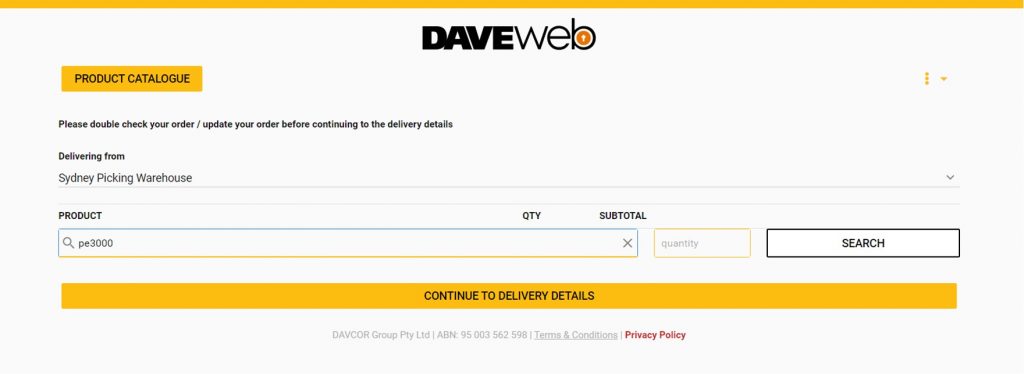
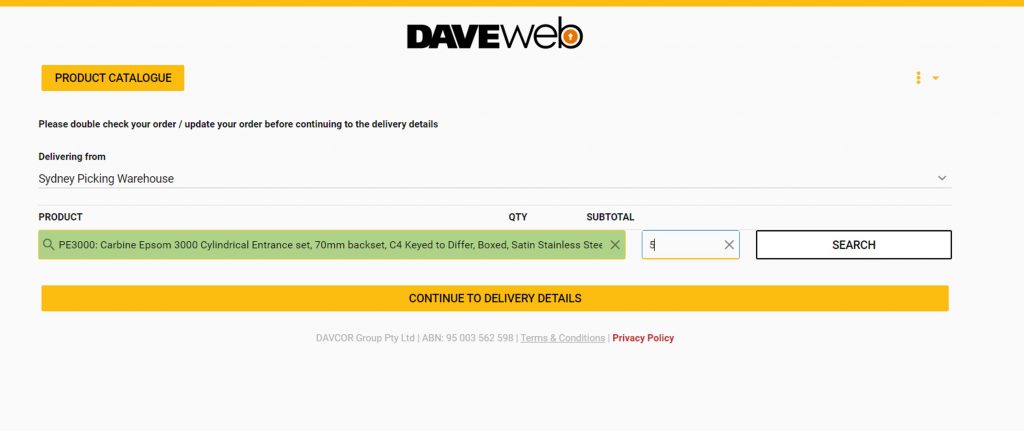
Product Search in Cart Shows Product Description
Entering an exact product code, catalogue code or related number will now return the product’s code and details.


SYDNEY • MELBOURNE • BRISBANE • PERTH • ADELAIDE • AUCKLAND